Getting a little lost on WordPress? We’re here to help! If you’re looking to edit your navigation bar in WordPress, you have come to the right place! WordPress can be easy to navigate with the right guidance, and we are here to help!
First off, let’s define what we mean by changing button labels on the navigation bar on WordPress. When people say changing button labels, they often mean changing the navigation menu (WordPress terminology can be confusing sometimes!) This is what a navigation menu will look like on a website:

Now that we’ve clarified what this blog post is really about, let’s get into the how-to! Check out this video that will walk you through the process, or follow along with the step by step below!
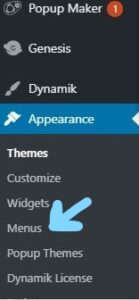
Go ahead and log into your WordPress site. Go to your dashboard, and you’ll see this side bar: hover over ‘Appearance’, and then click ‘Menus’!
On the menu page, you can click on the dropdown menu to see the options of your website’s menu. Click on the one you want to edit and hit “Select.”

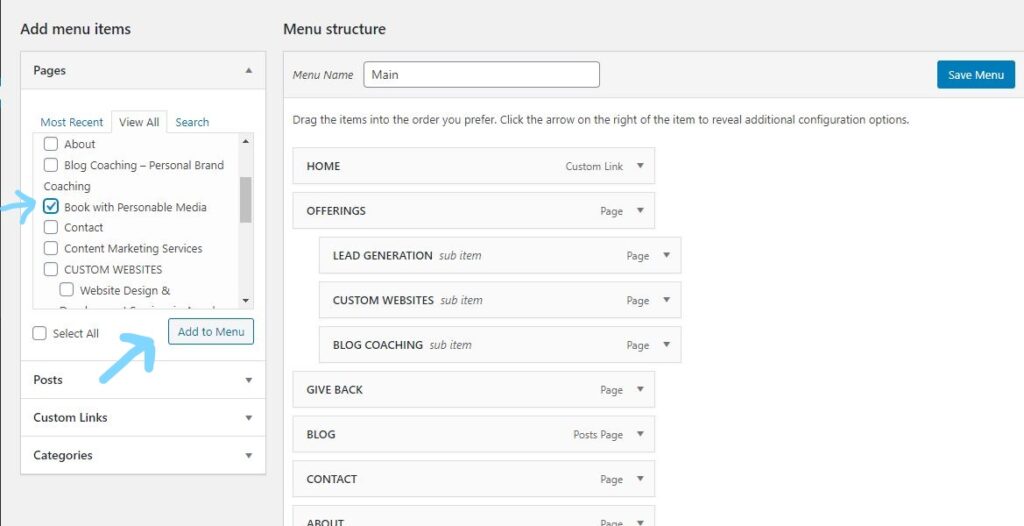
Let’s go over how to add a new menu to your item! One the left side of your menu page, you will see a box labeled “Pages.” This will show you all of the pages you have made on your website! If you would like to add one of these pages to your menu, check the box next to that page’s name, and click the “Add to Menu” button. Don’t forget to hit “Save Menu” when you’re done!
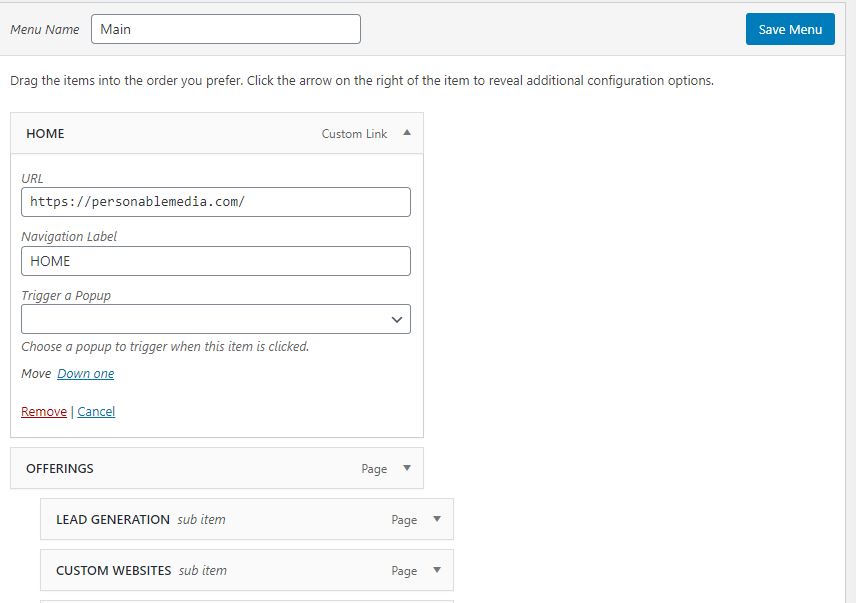
Lastly, click the down arrow on the navigation menu item that you want to edit. There, you’ll be able to edit the menu item’s name to what you want it to be! Don’t forget to press “Save Menu” when you’ve finished editing…even if you just switch to another menu, it won’t save if you don’t hit that button!
If you’re still feeling a little lost, reach out to us here at Personable Media, and don’t forget to check out our blog posts on WordPress for more tips, tutorials, and valuable information. Stay personable, Maura.


